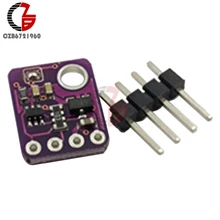
Another VEML sensor, this time its a VEML6075 and again we connect it to an Arduino Due
The VEML6075 senses UVA and UVB light and incorporates photodiode, amplifiers, and analog / digital circuits into a single chip using a CMOS process. When the UV sensor is applied, it is able to detect UVA and UVB intensity to provide a measure of the signal strength as well as allowing for UVI measurement.
The VEML6075 provides excellent temperature compensation capability for keeping the output stable under changing temperature. VEML6075’s functionality is easily operated via the simple command format of I2C (SMBus compatible) interface protocol. VEML6075’s operating voltage ranges from 1.7 V to 3.6 V.
Parts List
| Amount | Part Type |
|---|---|
| 1 | VEML6075 |
| 1 | Compatible DUE R3 Board SAM3X8E 32-bit ARM Cortex-M3 |
Layout

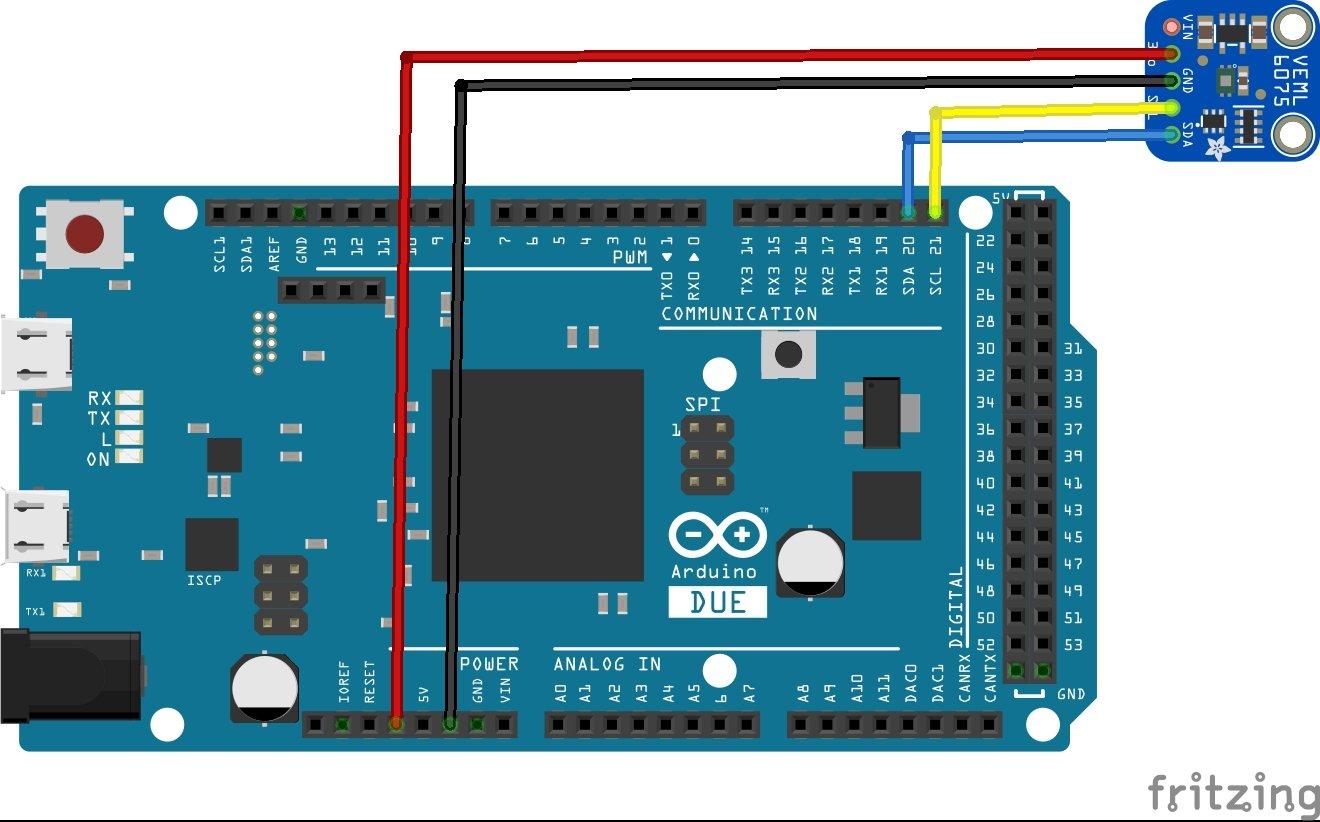
arduino due and VEML6075 layout
Code
Again we use a library and again its an adafruit one
This is the full example
[codesyntax lang=”cpp”]
#include <Wire.h>
#include "Adafruit_VEML6075.h"

Adafruit_VEML6075 uv = Adafruit_VEML6075();

void setup() {
  Serial.begin(115200);
  Serial.println("VEML6075 Full Test");
  if (! uv.begin()) {
    Serial.println("Failed to communicate with VEML6075 sensor, check wiring?");
  }
  Serial.println("Found VEML6075 sensor");

  // Set the integration constant
  uv.setIntegrationTime(VEML6075_100MS);
  // Get the integration constant and print it!
  Serial.print("Integration time set to ");
  switch (uv.getIntegrationTime()) {
    case VEML6075_50MS: Serial.print("50"); break;
    case VEML6075_100MS: Serial.print("100"); break;
    case VEML6075_200MS: Serial.print("200"); break;
    case VEML6075_400MS: Serial.print("400"); break;
    case VEML6075_800MS: Serial.print("800"); break;
  }
  Serial.println("ms");

  // Set the high dynamic mode
  uv.setHighDynamic(false);
  // Get the mode
  if (uv.getHighDynamic()) {
    Serial.println("High dynamic reading mode");
  } else {
    Serial.println("Normal dynamic reading mode");
  }

  // Set the mode
  uv.setForcedMode(false);
  // Get the mode
  if (uv.getForcedMode()) {
    Serial.println("Forced reading mode");
  } else {
    Serial.println("Continuous reading mode");
  }

  // Set the calibration coefficients
  uv.setCoefficients(2.22, 1.33,  // UVA_A and UVA_B coefficients
                     2.95, 1.74,  // UVB_C and UVB_D coefficients
                     0.001461, 0.002591); // UVA and UVB responses
}


void loop() {
  Serial.print("Raw UVA reading:  "); Serial.println(uv.readUVA());
  Serial.print("Raw UVB reading:  "); Serial.println(uv.readUVB());
  Serial.print("UV Index reading: "); Serial.println(uv.readUVI());

  delay(1000);
}
[/codesyntax]
Output
Open the serial monitor – this is what I saw but I tested this indoors
VEML6075 Full Test
Failed to communicate with VEML6075 sensor, check wiring?
Found VEML6075 sensor
Integration time set to 50ms
Normal dynamic reading mode
Continuous reading mode
Raw UVA reading: 0.00
Raw UVB reading: 0.00
UV Index reading: 0.00
Raw UVA reading: 0.00
Raw UVB reading: 0.00
UV Index reading: 0.00
Links
https://www.vishay.com/docs/84304/veml6075.pdf
I2C Interface 3.3V Board Based on VEML6075 UVA UVB Light Sensor Module


